Monthly Archives: February 2010

Cookbook Recommendations

Need a good cookbook?  There is nothing more valuable in a kitchen than a dependable cookbook.  Here are a few that I would recommend:

How to Cook Everything (Completely Revised 10th Anniversary Edition), Completely Revised 10th Anniversary Edition: 2,000 Simple Recipes for Great Food by Mark Bittman

The Bread Lover’s Bread Machine Cookbook by Beth Hensperger

Fix-It And Forget-It Big Cookbook: 1400 Best Slow Cooker Recipes by Phyllis Pellman Good 

Deceptively Delicious: Simple Secrets to Get Your Kids Eating Good Food by Jessica Seinfeld 

 Betty Crocker old school cook books – look at the library or at yard sales.  I don’t really like the newer ones because they use too many “pre-made” ingredients.  The older ones from back in the day are full of good old fashioned, made from scratch, but still simple recipes.

Visit My Amazon Store for more of my favorite things for the kitchen! 

What are some of your favorite cookbooks?

I have not been compensated in any way for these recommendations, however the links provided are Amazon Affiliate links.

One Pot Chicken, Veggies and Brown Rice

When I’m not using freezer meals for dinner and I have time to cook a more time consuming meal, this is a go-to recipe for me.  But when you read how easy this recipe actually is, you might call me a liar, because it’s actually not time consuming at all, it just tastes like it!

One Pot Chicken, Veggies and Brown Rice
Ingredients:
1 tbs olive oil
4 chicken breasts (you can also use bone-in pieces of chicken if you like!) cut in halves or thirds
coarse salt and ground pepper
1 large onion, 2 celery stalks, 2 medium carrots, cut into chucks
A little garlic for flava
About 1 cup chicken broth
1 cup cooked brown rice

 
Heat the oil in a deep pot. Season chicken with salt and pepper.  Place in hot oil.
Cook until golden brown on both sides, about 10-12 minutes.
 

Add the vegetables and broth.  You can use more or less broth depending on how you want this dish to turn out, soupish, chunky soupish or just veggies and rice.  Yes, soupish is a word.

Cover and let simmer over medium-low heat for about 15-20 minutes or until the veggies are soft enough for ya.

Serve over cooked brown rice and enjoy!

Chewy Granola Bars

My kids like to eat.  Often.  So snack time is a very big deal.  They love granola bars but the boxed ones can be filled with more sugar and preservatives than I care to feed my starving zoo animal boys. The ones that are organic and wholesome can cost you an arm and a leg and sometimes even an eyeball, so I decided a long time ago that homemade granola bars were the way to go!  I’ve tried a bazillion different recipes and this one is the result of many kitchen experiments and my family’s favorite!


Chewy Granola Bars

Ingredients:
3 cups oats
2 cups puffed wheat cereal (you can use rice krispies, but they puffed wheat cereal is a way healthier option)
(OR you can use 5 cups of just oats, no cereal)
1 cup flour
1 tsp baking soda
1 tsp cinnamon
1 cup honey
1/2 stick butter, melted
1 tsp vanilla
1 cup nuts, dried fruit, or chocolate chips (or a combination of any of them!)

Mix all dry ingredients together.

Mix all wet ingredients together.

Mix all together. Then add nuts, fruit, etc and fold in.

Pour onto cookie sheet(If you are using a regular cookie sheet, I would advise lining it with wax paper because these puppies are sticky! I use my nicely seasoned Pampered Chef Bar Pan and they come out perfect every time!).  Press down firmly until the entire pan is covered and the granola is packed down.

 Bake at 325 degrees for about 15-20 minutes.  That time is up for debate though because my oven is like a box of chocolates: you never know what you’re gonna get.  So just watch them carefully and remove when they are nice and golden brown, like this:

 Be careful not to overcook or they will not be chewy! And your husband who hates crunchy granola bars be will be severely disappointed and insist you use a timer next time instead of just “smelling for them.”

Oh, is that just my husband?  OK, sorry.

Score the bars while warm and then let cool.  These can also be frozen if your family will not eat the whole batch before they go stale.  Which I haven’t had to do in a good couple of years.

Check out Slightly Indulgent Tuesdays for more great recipes!

Parenting Tip: If It Doesn’t Hurt ’em, Let ’em


I’ve read a lot of parenting books over the last couple of years, thanks to the most stubborn child in the world.

One of the greatest pieces of advice I have read was this:

If it doesn’t hurt your child physically, emotionally, or break any moral rules that your family holds…let your child do it.  Yes, even if it’s a mistake.  It’s called “realistic consequences.”

It’s a hard one to do.  And you, of course, need to use some common sense while teaching your child this way.  But here is what it would look like:

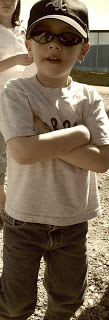
Charlie has a shoe/sock “thing”.  He doesn’t like to wear them.  Ever.  I can’t begin to tell you how many times we have fought with him over it.  Summer time is fine because he loves flip flops.  But once the chilly weather came this year, we knew we were in for it.  I spent so many days fighting with him to wear shoes with socks.

So. Many.

I didn’t want his feet to get cold or wet.  More importantly, I couldn’t stand having another parent stare me down in the grocery store with that “Look at that poor baby in flip flops, his feet must be freezing, what was that Mother thinking?!” look.

Then one day, I read this book and I decided, that was it.  Charlie was about to learn some realistic consequences and the judgy ladies at the store could go fly a kite.  Would going to the store in flip flops on a cold, rainy Fall day physically hurt him?  Nah, he wasn’t going to get frost bite or anything.  Would it hurt him emotionally?  Nope.  Would it break any moral rules in our family?  The last time I checked, we didn’t have any cold wet feet policies.  SO, this was it.

Realistic Consequences.

“Charlie, it’s raining out and it is quite chilly today.  I would prefer it if you wore shoes and socks today.”

“Nope.  I don’t like them and I’m not going to.”

“Ok, that’s fine, it’s your choice today.” (notice, I said TODAY)

(looks at me like I must be possessed with the soul of another, more easy-going, Mommy)

So we go to the store.  Charlie, in all of his four year old glory, walks right through a puddle.

Wet. Cold. Feet.

“MY FEET ARE WET!”

“Hmmm, why are your feet wet, Charlie?”

“Because I walked into that puddle!”

(trying super hard not to be sarcastic, but instead, very matter of fact)
“Oh, I’m so sorry that you got your feet wet when you walked through the puddle in your flip flops.”

The End.

I didn’t rub it in.  I didn’t pull out the I told you so that hung on my lips just waiting to be spit at anyone who would listen.  I let him feel those realistic consequences.

He whined.  He complained.  I ignored and said it again and again.

“I’m so sorry…”

Then when we got home, we had a little chat.  You know, after his toes were warm and dry.

“Charlie, how did it feel today when your feet got wet and cold after you walked through the puddle in your flip flops?”

“Uh, I hated it!  YOU should have carried me! YOU should have…”

“I did not choose the flip flops.  You did.  I gave you the choice and you chose flip flops.  What can you do next time to avoid getting wet and cold feet on a rainy day?”

“I don’t want to talk about that, Mom.”

“Ok, that’s fine, but if you ever do, I will be right here.”

The next time we went to the store (and I made sure to go on a wet, cold day).  I told him:

“Charlie I would prefer it if you wore socks and shoes today because it is cold and rainy.  But today, I’m going to let you choose.”

He stops, he thinks….I can see it happening.  The remembering…the wetness, the coldness of the toes, it was all coming back to him.

“Ok, Mom.”

GASP…it worked.

Now I hear a lot of your concerns already.  What about the times when I really do need my child to do what I ask?  That is the beauty of this.  When you give a little to your kids, they learn that when you “demand” something, you mean it.  When we are going to Church and I tell him he can not wear flip flops today.  He knows I’m serious.  Because all of the other days, I let him choose.

That conversation would sound like this:

“Charlie, we are going to church today.  Your choices for shoes are these brown sandals or these shoes with socks.”

“I want flip flops.”

“Sorry, that is not a choice today.  Your choices today are these brown sandals or shoes and socks.  Maybe you can wear flip flops tomorrow.”

They may not get it right away, but they will get it eventually.

Some people might say, “That kid needs to be bent over the knee and do what he’s told, none of this choices garbage!”  I respectfully disagree.

I don’t want obedient robot kids who do what they are told because they are afraid of me.

I want to raise responsible children who choose to do the right thing because…it’s the right thing.

Life is all about choices.  And when we teach our children, through realistic consequences, they learn what it means to make a good choice and a bad choice.

This kind of thing takes TIME.  CONSISTENCY.  PATIENCE.  But if you can just wrap your mind around the results, results that will last your child a lifetime, it is so worth it.

For more advice like this, check out Love and Logic.  I love this list of one-liners to get you off the hook in an argument with your kids and get the kids thinking!

Homemade Waffles

Waffles:  Another great way to start the day!  Be sure to double the recipe so you have extras to freeze!


Homemade Waffles

Ingredients:
2 Cups Homemade Biscuit Mix
1 1/3 cups milk (or more if needed)
1 tbs Milled Flaxseed
2 tbs water
1 egg
1/2 tsp cinnamon
splash of vanilla extract (optional)

This will make about 4-5 waffles, depending on the size of your waffle iron and how thick you make your waffles.  I doubled it and got 9 good sized waffles out of it.

Stir ingredients together until well blended.  Pour onto waffle iron.  (I have this one and it works great.)

Be careful not to pour too much batter or you will have this result:
Whoopsie!

Cook on waffle iron until done (about 4 minutes).  Some waffle irons have indicator lights for when they are done, mine is not fancy like that, but I can tell when it’s done because it will steam and when you open it, nothing sticks and it looks nice and brown, like this:

Enjoy!
Love these kid’s dishes? 
I reviewed them here at Bellaziza’s Favorite Things a super long time ago, but check them out of you like them!

To freeze your extras: Place on a cookie sheet or baking rack and freeze.  Once frozen, store in airtight, freezer safe container.  Stick in the toaster or microwave to warm up just like you would the boxed kind!

Mommy Guilt

It all looks so nice, doesn’t it? My pretty, organized (as it can be because I am not that techy) blog. My homemade recipes. My thoughts on parenting.

So nice, indeed.

Yet here I sit, feeling not that nice.

It’s Mommy Guilt, and it’s hovering over me.

I reacted to the situation instead of responding to my son.

I yelled too loud.

I sat too long and cleaned too little.

I lost my patience, even my mind maybe?  Just for a minute.

I am coming to realize, in my thoughts, in the stopping and listening to that little voice in my head and The One the puts them there, that this whole Mommy Guilt thing is not getting me anywhere.

What’s more important…

That I DO more. Or that I BE more.

Yes, that is the balance that I am trying to find.  Because it’s ok if I feed my kids corn dogs for lunch once in awhile.  I mean, I can’t make everything from scratch for goodness sake.

And it’s ok if we stop at Krispy Creme with Grandma.  Because, simply, I love donuts. 

And it is most certaintly ok that sometimes, my living room looks like this:

Because sometimes, what’s more important than a clean room are the memories being built amongst the blanket forts and the imagination that is growing in my boys’ reality-invading minds.

Yes, Mommy Guilt, you may as well leave now.  I have no more room for you in my busy mind.  It is too full of love and memories and good thoughts to share with my dear friends.

Applesauce Muffins

The original recipe for these muffins are from Deceptively Delicious, but I don’t do very well with following recipes exactly, so here is my twist on it!

Applesauce Muffins

Ingredients:
1 1/2 cups flour
1 cup oats
1 tsp baking powder
1/2 tsp baking soda
1/2 tsp cinnamon
1 cup unsweetened applesauce
1/2 cup milk
1/2 cup carrot puree
1/4 cup Agave Nectar
2 tbs milled flax seed
1/4 cup water
1 egg

Mix dry ingredients together.

Mix wet ingredients together in a separate bowl.

Mix all ingredients together.

(I know, this is hard, please try to follow along!)

Pour into muffin tins, it makes 12.  I usually use a heaping 1/4 cup measuring cup and it fills the muffin tins perfectly!

Crumbly Topping: (you know, the best part!)
2/3 cup oats
2 tbs brown sugar
1 tsp cinnamon
1 tsp flax seed
2 tbs butter, melted

Mi topping ingredients together and sprinkle evenly over muffin dough.

Bake at 400 degrees for about 18-20 minutes.

Enjoy, knowing this muffin is actually good for you!!!

A Time And Season For Everything

The weather has been cold and snowy and I just want to curl up with a cup of coffee and a good book.  Spring seems so far away as they are calling for a couple more inches of snow tomorrow.  *sigh*  I’m ready for sunshine, yard sales and the farmer’s market.

Lately all I want to cook are comfort foods.  Breads, muffins, casseroles.  And while these recipes are not as healthy as their raw veggie and grilled chicken counterparts, I have decided that’s ok. Because

There is a Time and Season for Everything.

We still eat pretty darn healthy around here.  We watch our sugar intake, eat whole grains, snack on raw veggies and fruit.  But sometimes, you just want something warm and gooey, like homemade Macaroni and Cheese.  And that’s ok.  Because,

There is a Time and Season for Everything.

Once Spring and Summer hit and the farmer’s market is overflowing with fresh fruits and veggies to experiment with and munch on, my recipes will reflect that time, that season.  For now, you may see more recipes like this instead.  And that’s ok.  Because,

There is a Time and Season for Everything

One thing you will notice though, is that my recipes will still be homemade, which is really more the point.  Even when we prepare comfort foods and yummy desserts to indulge in, we can do it homemade!  You know what ingredients are going into what you eat and you are not adding any additives, preservatives and other chemicals to your food. Soon, oh so soon, I will be posting recipes full of fruits and veggies and summer time deliciousness.  And that will be perfect for that season.  Until then, go ahead, make a Snickers Cheesecake from scratch and enjoy it while you can, because the season of comfort food is coming to an end.  And that’s ok, because, you guessed it,

There is a Time and Season for Everything

And I just love it that God made it that way.

Snickers Cheesecake Recipe

Oh yes, the one you have all been waiting for!  I won’t make you wait any longer, let’s get right to it!


Snickers Cheesecake

First of all, you are going to need a Spring-form pan.  You will see from the pictures that mine has been very well used.  I’m wanting one like this, maybe the cheesecake fairy will bring me one?  You can get a more affordable one like this if you are just starting out in your cheesecake making.  If you do not have a spring-form pan and can’t wait until your new one that you just ordered using my affiliate link so I can make some money, never fear!  Ahem.  Just line a 13×9 baking dish with foil, making sure to let the foil hang over the edges.  Spray the foil with a non-stick spray then follow the recipe below.  Then to serve the cheesecake just grab the corners of the extra foil and lift it right out of the pan. Look at you being inventive and adaptive in the kitchen!

Preheat oven to 350 degrees.

Crust:
20 chocolate graham crackers
4 tbs butter, melted
1/4 cup sugar
2 tbs water if needed

Crush or puree crackers until fine, add all other ingredients and mix together.  Add water if needed (if it’s too dry and won’t pat down).  Pat down into a spring-form pan.  Bake 6-7 minutes. Cool.

 I forgot the chocolate graham crackers, so I had to use regular, which is why they look, you know, regular colored.

Cheesecake Filling:
3 (8 ounce) softened cream cheese packages (you can soften the cream cheese by microwaving it in small intervals until nice and soft, but don’t cook it!)
1 cup (8 ounces) sour cream
1 cup sugar
2 eggs
20 mini or 3 King Size Snickers candy bars

Beat cream cheese on low until smooth.  The key to a smooth cheesecake is to beat the filling nice and slow.  If you beat it fast, too much air gets into the batter and it will not be smooth, it may also crack.

 Don’t worry if you don’t have a fancy schmancy mixer like this. I just got mine last year!  
A hand mixer will work just fine!  Also, that is regular sugar there, it just looks brown because it’s organic.

Add sugar, then the sour cream. Beat until smooth.  Add eggs one at a time and beat until smooth and creamy.

 TIP: I’m a pretty experienced baker but I still like to crack my eggs into a small bowl instead of directly into the mixing bowl.  There is nothing worse than trying to fish a stray egg shell out of a bowl of cream cheese!

At this point, I like to get out my spatula and scrape the bottom of the bowl.  You don’t want any chunks in your cheesecake!  If you find some chunks around the edges or at the bottom of the bowl, beat again until smooth.

Chop up the Snickers candy bars, trying as hard as you can not to do the ol’ one for the cheesecake two in my mouth game.


Fold in Snickers, leaving a handful aside to top the cheesecake with.

 Pour into cooled pan.  Bake for about 45 minutes or until the center is still a bit jiggly but the rest of the cheesecake is firm.  Cool and refrigerate.

 See? I hurried through the mixing stage and beat it too fast and my cheesecake cracked!

Ganache Topping:
2 cups semi-sweet chocolate chips
2 tbs butter
1/3 cup heavy whipping cream

Slowly melt all ingredients together while stirring until smooth.

Pour over cooled cheesecake.  Sprinkle with extra chopped Snickers pieces.  Let cool.

Undo the pan (or pull out with the foil if not using a spring-form pan) and look at all the pretty layers.  Pat yourself on the back!

Now to the good part.  To serve, drizzle with caramel and whip cream.

 Wipe the drool of your chin and enjoy!

My Secret to a Clean House

My house is clean and I’m not afraid to admit it!

I get a lot of rolled eyes when people come to my house and see how clean it is amongst four males in the house. But the joke is on them.  Because my house isn’t really that clean.  It just looks like it is.  You want to know how?  OK, I’ll tell you my secrets, but you may never look at my clean house the same way again!

When the boys were young, I had to find a way to make things work.  I had a newborn, a 15 month old toddler and a five year old…not to mention a husband.  A clean house was on the way bottom of my priority list.  I remember after Charlie was born, my Mom stopped by and I saw her face as she looked around.  Toys everywhere, dishes stacked high, dust bunnies waving at you.  It was not pretty.  I had to change the way I did things.  I couldn’t let the housework suffer. My Momma didn’t raise a slob.  So I learned very quickly how to clean the house quickly and efficiently as possible.

OK, now for the secrets, you ready?


Clean as you go.

AND  

Everything has a home.

I know, not very mind blowing.  Kind of a let down, isn’t it?

But it’s just that simple.  If you are a working Mom, you don’t have time to spend three days a week cleaning.  And if you are like me, a stay at home Mom who is hardly ever home due to baseball and volunteering at the school or tending to little ones, you don’t have the luxury of spending your precious free moments cleaning.

I clean the house one day a week.  I do the laundry one day a week.  That is it.  Yet I still have a clean house and clean clothes consistently.

When I say clean as you go, here is what I mean: Don’t leave for tomorrow what you can do right now.

If I walk past the garbage can and notice a that someone spilled something down the side of it, I stop right then and there, grab the wash cloth and wipe it up.  You might think, “I’ll get to that later when I clean the kitchen after dinner.”  No! Do it now!  When you go to clean the kitchen later, that is just one less thing you have to do.  Before you know it, that 15 minute clean up after dinner has turned into an hour because you have to wipe down the garbage can, clean that spill you ignored in the fridge earlier, wipe down the juice splattered down the cabinet from this morning, sweep up the crumbs still there from lunch…you get the picture.

If you clean as you go, you will save yourself so much time!

In the morning, I wipe the bathroom sink and toilet down after I get ready for the day.  It takes me 30 seconds and the bathroom looks clean every single day.  Then on my one cleaning day for the week, I go a bit deeper, clean the floors, clean the tub, etc.

I save vacuuming, dusting, sweeping and mopping for my one cleaning day.  But throughout the week, I wipe down the dusty tv as I walk past it, I take the dust-buster to the kitchen floor after the boys eat (just under the table not the whole floor).  When cleaning day comes, the messes are minimal compared to what it would be like if I would have ignored it the rest of the week.

Now hear me…Don’t deep clean as you go, quick clean as you go.  That’s why my house looks clean but it might not actually be clean.

And it will serve you well to teach your kids this also.  The rule is that we clean one mess before making another in the play room.  My boys have been taught since they were very little to wipe off the toothpaste from the sink when they are done, wipe off the toilet seat if they sprinkle, put their dirty dishes in the sink or dishwasher.

The little quick clean ups add up very quickly to a clean house.  Then spend your one day cleaning a bit more deeply.  You don’t have to focus on the little stuff because it’s done already.  You don’t have to spend half an hour sorting through the mail to clean the kitchen counter because every day when the mail came you took a minute to open it, sort it and put it in it’s home.  So your counter is already clean and you can focus on mopping the floors instead.  You don’t have to spend half your day cleaning toys off the playroom floor to vacuum because every day you (or if they are old enough, your kids) took 5 minutes to pick up the toys.

Oh yes, one more thing, put those kids to work!  Especially if you are a working Mom and your one cleaning day is on the weekend.  You don’t want to spend your entire day off cleaning!  So take a Saturday morning and work together to get it all done.  You will have a clean house and the rest of your day to do something fun!  If you work and have little ones…you have my sympathy.  Hang in there and just do the best you can!

If you can spend just a little bit of time making sure everything has a home, clean up time is much more efficient.  I will write more about that and other organizing tips in time.

So does this make sense? I don’t want to ramble, but it may be too late for that. LOL  You can have a clean house and eat your cake too…or something like that.

I’d love to hear your cleaning tips in the comments section!  We can all use a new trick or two up our sleeves!