Monthly Archives: February 2012

Recipe from Pinterest: Taco Pizza!

I’ve been browsing Pinterest like a fool, and pinning so many great recipes! This is a quick and easy one that everyone loved so I thought I’d share!

Taco Pizza!

It’s basically a crescent roll crust covered in taco fillings and baked! Super easy and fun for the kids to help make too! Not to mention they ate it like it was going to run off the plate.

All I did was spread crescent rolls into a cookie sheet, pressing all seams together. Sprinkle with cooked taco meat, a couple of kinds of beans so I could pretend that it was healthy and some cheese.  Bakes at 375 degrees for about 12-15 minutes, or until the dough is cooked through. Then cut into squares and sprinkle with lettuce, salsa, sour cream etc.

Easy!

It looks like the original recipe is from Pillsbury but I found it through this pin.

What I’m Doing Today

I’m packing suitcases and snacks and movies. I’m loading all my dirty laundry in a big bag so I can wash it at my Mom’s.

I’m going on a trip!

The boys and I are driving down to visit my family in Indiana today. The last time I drive there alone it took me about 18 hours. We drove 9ish hours and stopped at a hotel and drove another 9ish hours the next day. This time we are driving 5 hours to my in-law’s home and staying the night then finishing the rest of the drive the next day.

I might be crazy.

Will I make it? We shall see. I’ve made it before. Here are my travel tips in a video I posted the last time I made this drive.

My newest travel tip, which I found on Pinterest, is to pack the kids activities and snacks in these handy little craft buckets. The boys are very excited about it. We’ll see how long that lasts. My bet is hour one.  What’s yours?

I’m not sure why this photo insists on being sideways. I’ve tried to fix it for 15 minutes. I give up!

Wish me luck!

My Memories Suite Digital Scrapbooking Software – Review & Giveaway!

I haven’t posted much about my love of scrapbooking here because I haven’t had the space to do much while living in this tiny apartment. I’m totally addicted to it! Once I start, I can’t stop. Just ask my husband. He calls scrapbooking an occult. Dramatic much, Honey??

I was super excited to hear about My Memories Suite because, OMG, I can scrapbook ON MY COMPUTER?! This is going to be fun! Nothing will replace my love for paper and glue and sparkly bling smooshed together, but when I want to get creative and can’t (or just don’t feel like) dragging all of that stuff out…digital scrapbooking to the rescue!

This is perfect for quick projects. You can pick a template, upload your pictures, and have it printed. It’s so easy! I loved that you can also add embellishments (my favorite part of scrapbooking). There are SO many options to use that I haven’t even tried them all yet.

My favorite things about My Memories Suite:

-You can either pick from a library of templates or make your own. Want to be creative? Do it. Want to stick pictures in and be done while still having a cute album? Done!

-Add embellishments, shapes, different fonts…so many options.

-More than just pictures! You can upload videos and edit by adding music, text and more. Love that!

-Share your albums! There are options to save your albums and share with others, including printing them!

-Card making – Christmas cards for next year? So easy.

-Narrate your pages. Ok, this is cool. You can record yourself talking about each page and save your albums on a disc. So instead of browsing a paper album and reading the words, you can look at them on your computer or tv screen and listen to the narrations! That feels like such a fun George Jettson way to look at pictures! GREAT gift!

Here is a screen shot of one of the albums I’m working on right now…

So, of course, I’m going to share the fun with all of you! First off, please enjoy $10 off your purchase of My Memories Suite! Use coupon code STMMMS4969 to get $10 off instantly!


Once you receive your software, you will also receive an additional code for $10 off your next purchase at MyMemories.com!

BUT WAIT THERE’S MORE!  Sorry. I know, but I had to…
One of you will win it for free! Just visit MyMemories.com and tell me what you see that you love the most! What’s your favorite kit, template or designer…and that’s it! You’re entered to win the My Memories Suite digital software!
Giveaway ends Thursday, February 23rd at midnight and the winner will be announced Friday!
Share the love by tweeting or facebooking about the giveaway for an extra entry! Just tell me you did so with a link in your comment.
Good luck!

*I was provided with a free copy of this software, however, all opinions are my own! I really do love this! I’m not a liar. 🙂

Dinner Date

Really bad picture of the back of Matt’s head. We’ll say it’s artistic, not blurry.

Matt and I had plans to go to dinner with some friends last night. He asked me to get him some clothes ready.

Me: “What do you want to wear?”

Him: “I don’t know. All I know is that I want to wear my nice brown boots.”
Me: “Is this shirt ok?”
Him: “I don’t know I kind of feel fat today.”
Me: “Soooo…”
Him: “I don’t know. You know how sometimes you just feel fat and nothing fits right? I might be having that kind of day.”

Me: “Actually, I know exactly what you mean. But I’m not going to iron this shirt if you aren’t going to wear it.”

Him: “Fine. I’ll just look fat all night.”

Apparently I married a woman.

She sure is cute in those nice brown boots, though!

And not fat at all. 

How To Roast a Chicken

Roasting a chicken can sound overwhelming and just plain hard if you are a beginner in the kitchen. I remember in my early days of learning to cook that I wouldn’t even try! If whole chickens were on sale, I wouldn’t know the first thing to do with it! So I thought I’d share how I do it for those of you just getting to know the kitchen.

Sometimes whole chickens (also called fryers in some places) will go on sale. The one I cooked here was only $5!! They can be frozen, of course, so if you have freezer room, stock up when they are that cheap! You will then need to let it thaw in the fridge for a good day or two, depending on the size. Mine was a little over 5 pounds and took a good two days to thaw in the fridge.

A very important thing you should know if you have never cooked a whole chicken (and all of this applies to roasting a turkey as well which I posted about here!) is it will usually come with some weird things stuffed inside. Gizzards, the neck, and all kind of gross things. Some people like to cook these things. Those people are not my friends. Pull all of that out and throw it away, please and thank you.

Prepare the bird. OK, some people say to rinse the bird and pat it dry. Some people say not to because of bacteria or whatever. I usually do. Do what you want!

Preparing the bird is not as difficult as you think! It’s very simple to get a nice moist chicken with lots of flavor!

Rub the bird down with butter or olive oil or…ahem…both. I like to make sure my roasting pan is coated so it doesn’t stick. I will then rub the bird with butter and diced garlic and sprinkle with salt and pepper. You can also sprinkle with other seasonings, throw in some fresh herb sprigs, whatever floats your boat! Here I used some Italian seasoning. For extra flavor, try to rub some butter under the skin too. YUM. I also like to sprinkle some lemon juice on it as well.

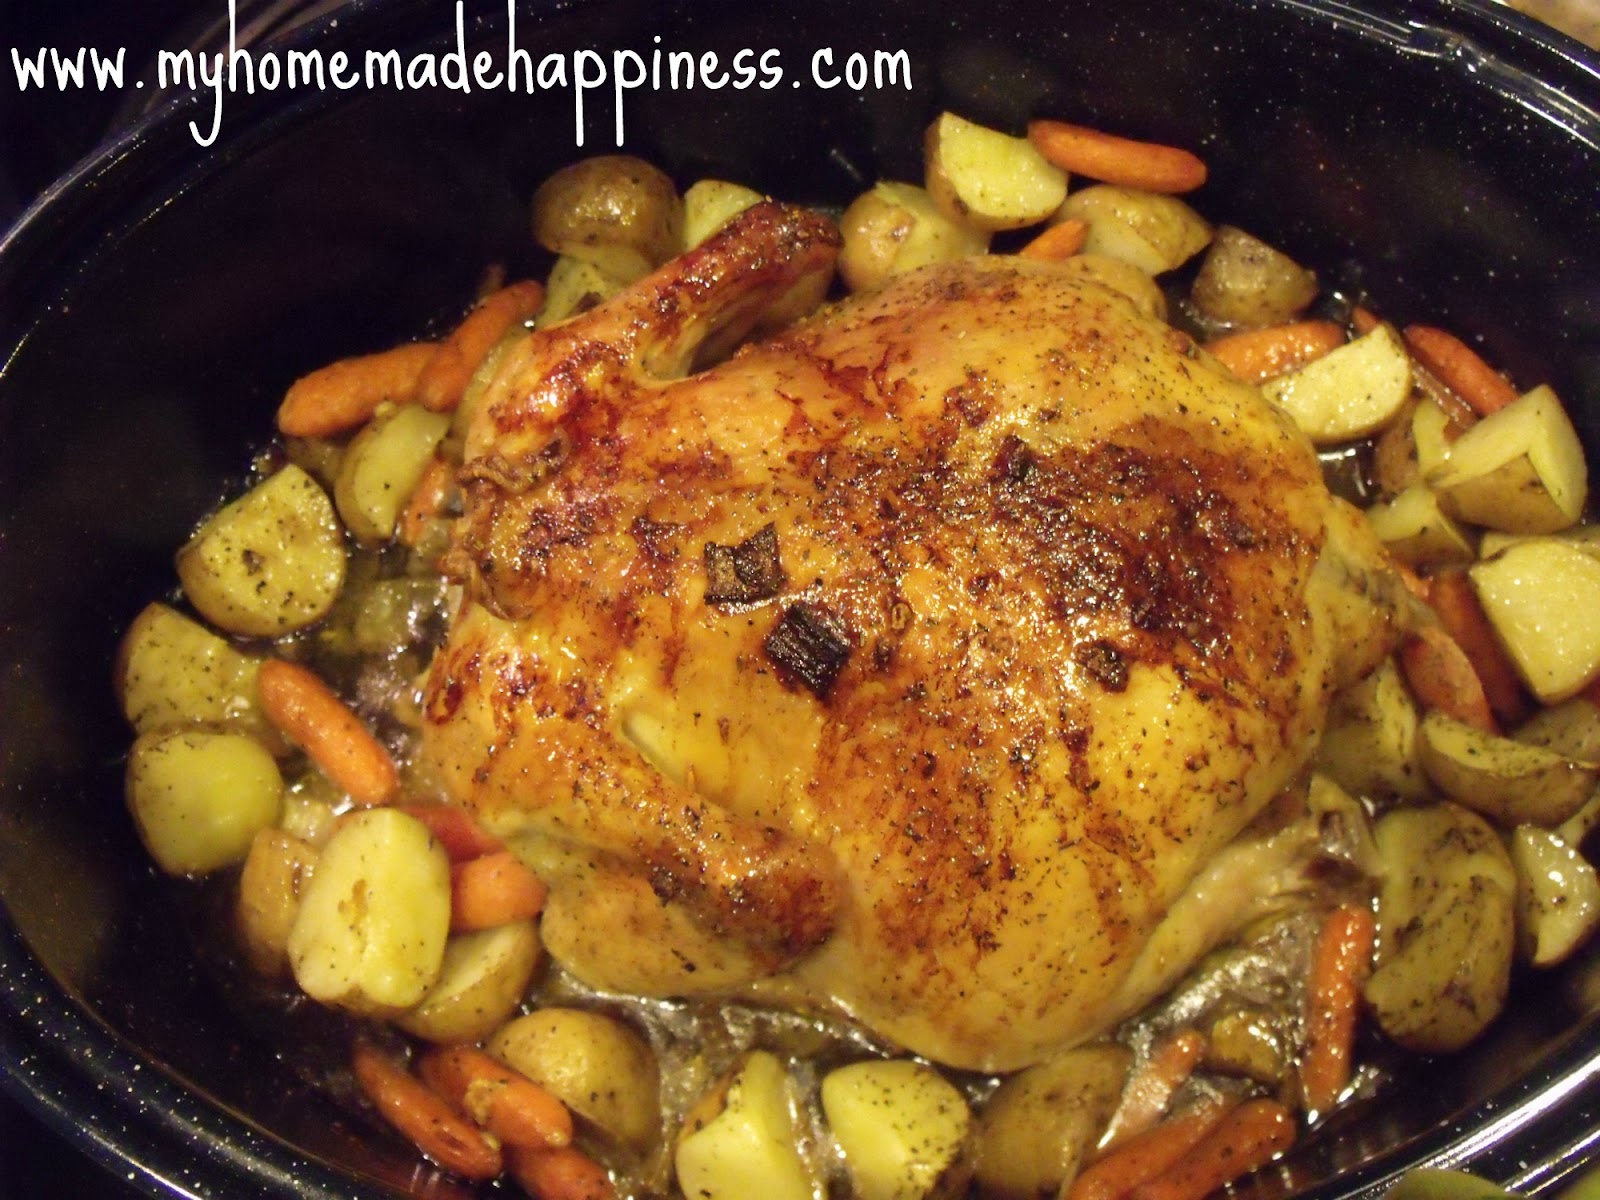
You can cook the bird alone if you like. I prefer to roast mine with potatoes, onions, and carrots. You can add any kind of veggies. If a veggie is tasty roasted, it’s tasty roasted with a chicken! This will also make for some extra delicious juices in the bottom of the pan. Season your veggies and drizzle with olive oil or spats of butter as well.

Bake at 350 degrees uncovered. It should take about 20-25 minutes per pound. Since mine was a little over 5 pounds, I knew it would take at least 2-2 1/2 hours. Baste the chicken with the juices at the bottom of the pan during cooking. If you don’t have a baster, just use a spoon! Use a meat thermometer to check the temperature by placing in the fattest part of the bird. Poultry is fully cooked at around 170 degrees.

Let the chicken sit for a good 5-10 minutes before carving into it. I like to serve it over rice with all of those tasty juices. Serving over rice makes the meal go even further!

What I love about this meal is that I can get a good three meals out of it. I’ll serve it over rice for one night and eat the leftovers the next day and still have enough chicken to throw into a pot pie another night that week!

See? It’s not that hard at all! Go ahead and buy some chickens on sale and have some fun with it! You’ll get plenty of meat off if it to last at least two or three meals. Have fun and enjoy!

Recipe: Easy Three Ingredient Peanut Butter Cookies

There is nothing better than the classic peanut butter cookie and a glass of milk. Here is a recipe using three ingredients that will make you very happy!

1 cup sugar
1 cup peanut butter
1 egg

Mix together. Plop on a cookie sheet. Bake at 350 degrees for about 12 minutes.

Seriously, it’s that easy.

I use a cookie dough scoop to make mine nice and round. But you could just use whatever spoon you have! I then use the crisscross fork trick to flatten them down. If you are making them into the ever popular peanut butter blossom cookie, just leave them as a round ball and after baking, squish a Hershey’s kiss on top. This recipe also works perfect in a cookie press!

My biggest cookie making tip is not to over cook them! Take them out just before they are done and let sit on the cookie sheet for a minute before transferring to a cooling rack. This lets the sugars crystallize and the cookie will harden but still stay soft inside!

Enjoy!

Linked to:

 Photobucket

Parenting Tip: Questions Create Thinking

I haven’t posted any parenting advice lately so I thought I’d pass on this little snippet of great insight from my favorite parenting site, Love and Logic.

At Love and Logic® we believe that kids are best prepared for the real world when we allow them to do as much thinking as possible. It’s good practice for the real world, and it keeps the monkey off of our backs most of the time.
Here’s the problem. Do you know kids who like to keep adults doing all of the thinking? Do you know kids who are good at tricking us into doing so?
How do we avoid falling into this trap? 


One strategy involves using plenty of questions!
The more questions we ask,
the better thinkers our kids will become.
People who understand Love and Logic also understand that the human brain seeks closure. When we use plenty of questions, children’s brains are so busy searching for closure that they have less energy left over for power-struggles.
The more questions we ask,
the fewer power-struggles we will have. 


 Kids grow the healthiest and strongest brains when they’re fortunate to spend time around adults who say things like: 


 “I don’t know. What do you think?” 


 “Are you sure that’s the best idea?” 


 “How do you think that’s going to work out for you?” 


 “Would you like to hear what some other kids have tried?” 


 “Do you think that’s going to work out well or ________?” 


 “What do you think you are going to do?” 


 “Which one of these is the best solution to your problem?” 


 “Do you have enough money to pay for any possible damage?” 


 “Is that a wise decision?”


I love this advice. I love putting the questions back onto the kids and not draining myself over their problems.

Try it. You’ll like it. 🙂